Wednesday, November 11, 2009

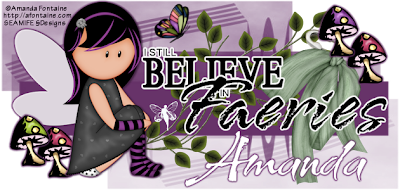
I Still Believe In Faeries


I Still Believe In Faeries

This tutorial was written by Serina on the December 5th 2008. Any similarity to any other tutorials is purely coincidental. Tutorial was written using PSP X2 but should work in any other versions to.

Supplies

Scrap kit Cheerful Pixies by
Amanda Fontaine
Tube is by
Amanda Fontaine
Both can be purchased from her store
Made By Manda

Mask
HERE .. mask has been collected over the years so I do not know who it belongs to. If you know please email me and I will provide the credit for it.

♥♥♥♥♥♥♥

Open new white canvas size 630x300

Layers - New Raster Layer - Ok

Flood fill this layer with a dark color from your tube.

Layers - New Mask Layer - From Image - ao_76_mask.jpg.

Right click on the mask layer and delete.

Right click on the group raster, merge group.

Highlight the masked layer, right click - duplicate.

Image - Mirror. Image - Flip

Lower the opacity of this layer to 37

Copy/paste your fairy tube, resize to fit the canvas. Position it where you like.

Copy/paste the "I Still Believe in Faeries" word art and resize it to fit the space depending on your tube.

Add your elements. I added a few mushrooms, the beautiful butterfly, and leaf branch, the cute little silhouette fairy and one of the bows.

Add your copy write information and license info.

Now you can add your name. I used the font called KolkerBrush set at 120 points. Fill set to white, stroke is null. Then I applied the thin eye candy gradient glow with the color purple. Add a drop shadow to the text.

Delete the white background layer, merge all other layers and save.

All done!!
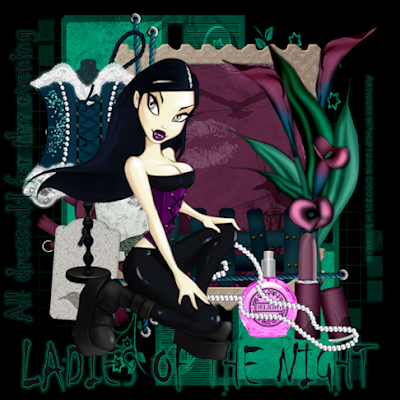
Ladies Of The Night


Supplies

Scrapkit Ladies of the Night by Simone HERE
Tube of choice, I'm using the work of Rion Vernon, which can be purchased through CILM
Mask by Essexgirl called sg_multi-boxes.zip download from HERE

♥♥♥♥♥♥♥

Open your tube of choice and your mask and shrink them down.

New File - 600x600 white canvas

Selections - Select all - copy/paste a paper of choice as new layer. Image - resize - 95%, selections invert, hit delete once on your keyboard, selections - select none.

Layers - New Mask Layer - From Image. Find the sg_multi-boxes in the dropdown list, source luminance and invert mask data checked, hit okay.

Right click on the mask-promoted layer and hit delete, say yes when the popup appears. Right click on the mask layer and merge group.

Copy/paste frame7 to canvas
Using your freehand magic wand tool make your way around the frame right in the middle of all sides.

Copy/paste paper of choice as new layer, image - resize to about 30% - selections Invert - hit delete once on paper layer
Drag paper layer below frame

Copy/paste the fence2, resize by 40% drag it below your frame and position it like mine

Copy/paste the maniquin to the left side of the frame and then copy/paste the corsett of your choice and position it so that it looks like its hanging off the maniquin.

Copy/paste tube of your choice and position it where you like.

To add a bit more color to the side I also copy/pasted the Silver Eyelet2 right below it so that its on the maniquin post, and I copy/pasted the Tags and String, and put them below the corsett and maniquin layers so it looks like its wrapped around the string.

Then copy/paste any other elements you like and place them where you think looks good. I used the lipstick and the spray bottle and the beads.

If you'd like to add some text like I did go ahead and add it now. I used a font called Chiller for my text and then applied a gradient glow. If you want the same exact font just type in Font Chiller in google and you'll find loads of places to get it :)

All thats left now is to add your copywrite information, your watermark and license info and any text you like.

Right click on the white background layer, delete it and then merge visible on the rest of the layers.

Hope you enjoyed this tutorial :)

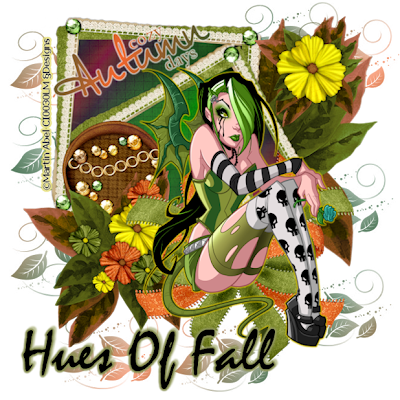
Hues Of Fall


Hues Of Fall

This tutorial was written by Serina on the Oct. 6th 2008. Any similarity to any other tutorials is purely coincidental. Tutorial was written using PSP X2 but should work in any other versions to.

Supplies

Scrapkit "Indian Summer" by Cyrene, its a freebie get it HERE

Tube of your choice, I am using the wonderful artwork of Martin Abel purchased from CILM and used with a license.

Eye Candy 4000 - Gradient Glow HERE

Texture of your choice

Brushes or Wordart of your choice - I used the fabulous brushes of Agi which you can find on her deviantart site pspagi.deviantart.com

♥♥♥♥♥♥♥

Okay here we go ...

Copy/paste the frame to your new canvas, position in top left corner, duplicate frame

Image - Flip --> Image - Free Rotate - Left by 26 Degrees

Select your magic wand tool, highlight first frame layer and click on the white space

Highlight second frame copy, using the shift key and your mouse click in the white space on the second copy frame. This should now add to the first frame selection

Selections - Modify - Expand - 20 pixels

Copy/paste paper of choice as new layer

Image - Resize - 50% Resize all layers UNCHECKED

Selections - invert - hit the delete key once, Selections - select none

Drag this layer below the two frame layers and then Duplicate layer

Highlight the original paper layer

Find your Change to Target Brush icon and click on it.
Set your foreground color to #1e532c and your stroke color to #f46730 (or pick two colors that will work with your kit selection and tube), and then switch your foreground to Gradient. You should now have both your colors in the form of a gradient fill. Click on the foreground color, and make your settings as below, and select a texture of your choice to if you like.


No go back to your paper layer and click a couple of times on it .. play around until you get something you like.

Change the blend mode of this layer to difference.

In your materials pallet where you have the gradient stroke, click on the texture button to remove it, and then go back and just click once or twice on the same layer to give it a tint.

Now to add your tube, copy/paste it to the canvas and position it where you like.

Then add your embelishements. You can use what I did (refer to my tag in header) or you can just go with your own ideas.

Add a new layer and drag it right down to just above the white background layer, and add any brushes you'd like. I used leaves by Agi. Also I used her wordart Cozy Autumn Days.

Add your copywrite info, add your name, right click on the white background layer, delete this layer. Merge visible and save.

Thanks for trying my tut.

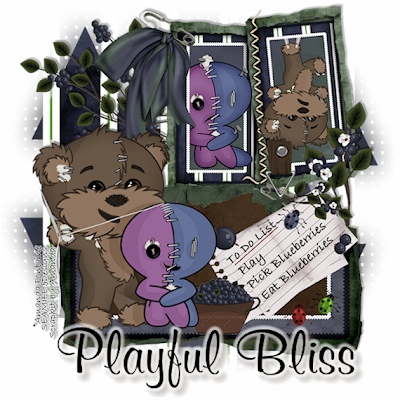
Playful Bliss

This tutorial is written using PSP X2 but can be done with earlier versions.

Supplies

3 tubes of your choice, I am using the fabby arwork of Amanda Fontaine

Scrapkit of choice, I am using Amanda Fontaine's Bloo Berry Bliss Kit

You can find Amanda's tubes and kits at her new store Made By Manda.

Mask by Vix_Mask55

Font of choice

♥♥♥♥♥♥♥

Lets get rockin ..

Open a new canvas 600X600 white

Copy/paste a paper of your choice as a new layer. Move it to the top left corner of the canvas leaving a little white border around the edging.

Layer - New Mask Layer - From Image

Select Vix_Mask55 and click okay. Right click on the Mask Copy, delete and say yes. Then right click and go merge group.

Move the mask layer a little further up the top again so that you will see it after your tag is created.

Duplicate the mask layer, Image Flip, Image Mirror

X out background layer and merge visible. Un-X the white layer.

Pick two frames from the kit you are using.

Copy/paste the first frame to canvas.

Use your magic wand or freehand selection tool and draw around the frame keeping in the middle of it. See screenshot.


Now using a different paper copy/paste it over as a new layer. Selections - Invert and hit delete. Selections - Select none.

Move the paper layer below the frame.

Copy/paste a tube/s of your choice in the frame.

To make it look like your tubes are half in and half out of the frame, use your Freehand selection tool and select the bit that you want to have on top of the frame.


Remember if you use 2 different tubes in the one frame then you must do this on both layers.

Then Right click on the tube layer and select Promote Selection to Layer. Drag the Promoted Selection layer above the Frame layer.

Selections - Select None

X out the white background layer and the mask layer. Merge visible. Resize.

Copy/paste the other frame you chose, and repeat the same steps but use a different paper in this one.

Now just add all your embellishments. If you want to use the bit of notepaper then type your text on it and merge the layers onto the notepaper and then resize and place it.

Add your copywrite, and your watermark and lic. info.

Add your text etc. Delete the white background, and merge all the rest of the layers. And you're done.

Thank you for trying my tut, I would love to see your results if you try it.

Here's a slightly different version made a pressie for Amanda .. hope you like it


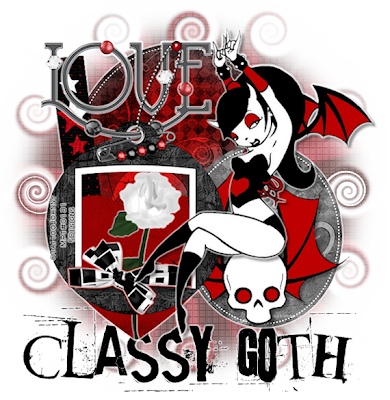
Classy Goth


Classy Goth

This tutorial is written using PSP X2 but can be done with earlier versions.

Supplies

Cheri's template #13 from her blog Wild Creations

Simone's kit Classic from her blog Scrappy Bit Of Fun

Eye Candy 4000

Tube of choice, I have used one by the artist Tattoo Johnny and you can purchase his artwork at mypsptubes.com

Font of your choice .. I used Get Heroin?

Lets start ...

Open your template, hit Shift+D to make a copy of it and then close out on the original. Delete the Watermark layer.

Select 5 papers of your choice from the kit and keep them open.

Image - Canvas Size - Width 600, Height 616, Lock aspect ratio checked - Click ok.

Highlight the background layer, and floodfill with white by clicking on the transparent area.

Back to your template, highlight the dark grey circle layer. Selections - Select all - Selections - Float - Selections - Defloat. Selections - Modify - Smooth. Use Smoothing amount 10 and Corner scale 10, Anti-alias and preserve corners checked. Click ok.

Copy/paste a paper of your choice as a new layer. Selections - Invert - Delete.
Delete the dark grey circle layer now.

Highlight the light grey circle line, selections - select all - selections float - selections defloat. Open up a white paper and copy/paste it over as a new layer, selections - invert and delete.
Delete the light grey circle layer.

Repeat the steps for the circle and circle line for the light grey circle and line.

Delete the template layers for those when you've done the steps.

Go to your heart layer, repeat same steps to fill it, then delete the template heart layer.

Same thing for the med grey bar and the stars. Keep deleting the template layers as you fill them so you don't get confused and have to many layers.

Copy/paste your tube, position it where you like and add a drop shadow to it.

Select whichever embelishments you'd like to use. I used the TagWithBeadsChain, WrappedBow1, Rose 2, and Love Charm.

Open the Japanese Fan, I used the red but you can use the black and colorize it to suit your tag. Copy/paste it right above the white background layer.
Resize it by about 60%.

Duplicate it and flip it, position them so that it will give you enough to work with after applying the following effects.

Merge just those two fan layers.

On the merged fan layer do the following:

Adjust - Blur - Motion Blur


Effects - Distortion Effects - Curlicues


Now "X" out the white background layer and the fan layer, and merge the rest of the layers. Apply a thin white gradient glow using Eye Candy 4000 just to make the tag stand out a little from the background you just made.

Add your copywrite, and your watermark and lic. info. Add your text etc. Delete the white background, and merge all the rest of the layers. And you're done.

Thank you for trying my tut.

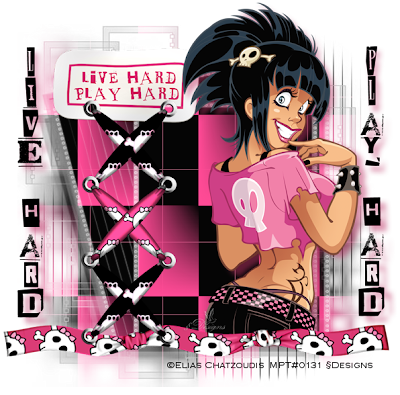
Live Hard Play Hard


Live Hard Play Hard

This tutorial was written by Serina on the July 7th 2008. Any similarity to any other tutorials is purely coincidental. Tutorial was written using PSP X2 but should work in any other versions to.

Supplies

Mask by essexgirl.uk.com HERE (or one of your own choosing)

Alf's Power Toys HERE (You will be using Color Grid)

Plugin Mura's Seamless Checks with Graduation - Google if you don't have it

Scrapkit by Missy of Misfits Scrapz HERE

Tube of your choice, I am using tubes by Elias Chatzoudis purchased from MPT and used with a license.

Font of your choice.

Lets get started

Open a 600 x 600 white canvas

Create a new layer, and floodfill it with Black

Effects - Alf's Power Toys - Color Grid using the following settings or pick a color from your tube and adjust the Red, Green and Blue settings to match it:

Horizontal Divisions - 5, Vertical Divisions - 5, Red - 255, Green - 75, Blue - 150


Go to Effects - Plugins - Mura's Seamless - Checks with Graduation and apply the following settings assuming you're using a tube that has pink, if its a different color then play around with first three Color settings to get the color that matches your tube.

Color R - 255, Color G - 75, Color B - 150, Effect - 255, Ratio - 128, X Number - 3, Y Number - 2, Gradation - 219


Go to Layers - New Mask Layer - From Image.

In the dropdown section select your mask, sg_geometric-grungframe1, make sure Source luminance is selected and a checkmark is in the box next to Invert mask data.

Go to your layer palette and right click on the mask-raster layer and delete, say yes to the popup that comes up. Then right click again and Merge Group.

Copy/paste and add your tube, positioning it where you want. Add a drop shadow

Now you get to have a little fun and place your elements and ribbons where-ever you like, just play around till you find a layout you like or you can duplicate mine by referring to the header tag.

If you are using something like the Live Hard Play Hard ticket and you want to put the holes in it, all you have to do is once you've placed the crisscross ribbons, use your selection tool, freehand, and draw a little circle around the metal bits and hit delete on the ticket layer so the wholes are made in there and you don't delete the metal from the ribbon.

All done, just add your copywrite and license information if you're using a licensed tube. Add your name to the side like I did using a font of your own choice. The font I used is Anonymous Clippings and can be found on dafont.com. I added a Lokas 3D Shadow to my text that had a little tinge of pink.

To keep your tag on a transparent background go to the first white layer and delete it in your layer palette. Then merge all the rest of the layers.

Hope you enjoyed the tut and can't wait to see your results.

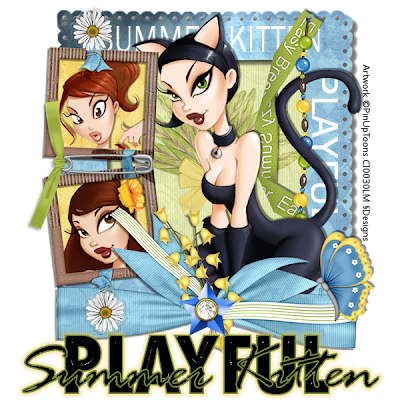
Playful Summer Kitten


This tutorial is written using PSP X2 but can be done with earlier versions.

Supplies

Breezy kit by Simone which you can download from her blog HERE.

Tube of your choice, I am using tubes by Rion Vernon (PinUpToons) purchased from CILM and used with a license.

Font of your choice.

Lets start

Open a 600 x 600 white canvas

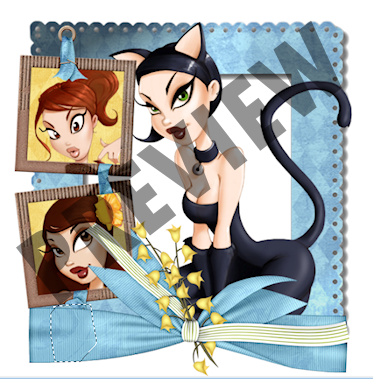
Copy/paste the LH_Breezy_Frame6 to your blank white canvas. Resize to what you're comfortable with.

Copy/paste the LH_Breezy_DoubleFrame1 and place it on the left side of your white canvas on top of the other fame. You can place it where it looks best depending on the tubes you have selected to use. Resize to your liking.

Using your magic wand select the inside of the top square of the frame you just put on

Selections - Modify - Expand by 3.

Copy/paste a paper of your choice as new layer. Position it where you like, then go selections - invert and hit delete ones on the paper layer. DO NOT DESELECT yet. Go to Selections - Invert, and copy/paste your tube of choice, position it inside the square you're working in. Then go Selections - Invert and hit delete once on the tube layer this time. Selections - Select None.

Reselect the frame again and then do the same for the second square bit.

Now we need to move both paper and tube layers to below the frame layer so just drag them down below the frame layer.

Copy/paste your third tube onto the white canvas and position it where you like.

Open up the ribbon wrap of your choice, I used LH_Breezy_RibbonWrap2. Copy/paste it to your tag. Resize and position where you'd like it. You can also play around with it using rotation or flip it etc. I used mirror on mine so that the flowers were positioned where I wanted them.

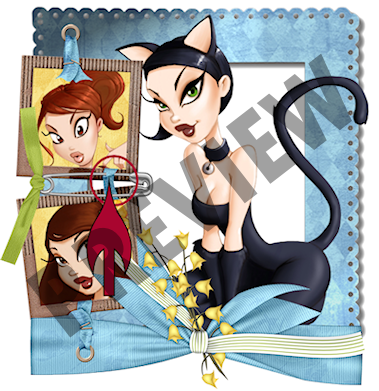
Lets bring our ribbon bit from the frame which is hidden up above the bow. To do this select your freehand selection tool. Go around the bit you want to show above the ribbon. In your layer palette select the frame. Right click on it and go promote selection to layer. Selections - Select none. Go to the layer that says Promoted selection and drag that layer above the big ribbon.
selectionpreview1.png picture by serinadesignstuts

Copy/paste the LH_Breezy_SafetyPin1 onto your tag canvas. Resize and position where you like. I wanted to make it look like the pin went through one part, so take your eraser tool, and using a size 6 just erase a little bit of the top pin thats on the top part of the frame.
pineraserpreview.png picture by serinadesignstuts

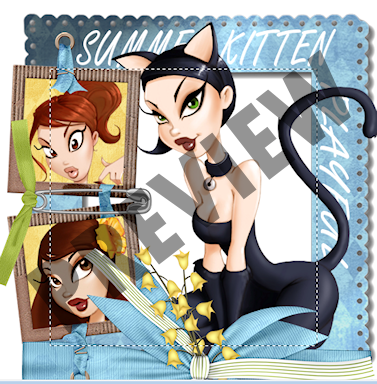
Now we can add some words to our frame. Type out your words on the outside of the frame using a blocky font. Fill color doesn't matter, and stroke is null. Stretch your text out to fill the space, but make sure not to cover the holes in the frame. Convert text to Raster Layer. Move it below your tube for now and put the layer right on top of the blue frame layer. Selections - Select All - Selections - Float. Highlight the frame layer now in the layer palette and hit delete once on your keyboard. Selections - Select None. Go back to your text layer and right click and delete it. You should be able to see the text on the frame now. Do the same for the sides of the frame that are visible if you like.

Okay now lets put a background in the blue frame behind the tube. Select the blue frame layer, then using your Selection tool set to Rectangle, select the inner frame bit just going below the text in the frame so you don't cover it. See preview for what I mean.
innerblueframeselectionpreview.png picture by serinadesignstuts

Now copy/paste a resized paper of your choice as a new layer. Selections - Invert, then hit delete on your keyboard once. Selections - select none. Drag this layer below the frame. If you picked a dark color paper you may want to drop the opacity of this layer to 50 like I did.

Copy/paste the LH_Breezy_FanFlower1 (or any flower of your choice) and resize it to fit the inside of the frame and position it just above the paper you just did. Drop the opacity of this to about 60 or 50.

All thats left is to just add your embelishments that you like. I added the Butterfly, the beads, the Easy Breezy Summer ribbon and the two flowers at the top and bottom of the cardboard frames. Rather than adding drop shadows to everything go back and only add drop shadows to the things are showing a bit off the main frame and also to you rmain tube. I ended up adding drop shadows to the carboard frames, the butterfly, the smaller tubes in the frames, the main tube and the green ribbon.

Add your copywrite. Resize if you like and then add your name or whatever you like. Delete your white layer and then merge visible. Thats it .. all done!!

Thanks for trying my tutorial and I hope you enjoyed it.