
This tutorial is written using PSP X2 but can be done with earlier versions.
Supplies
Breezy kit by Simone which you can download from her blog HERE.
Tube of your choice, I am using tubes by Rion Vernon (PinUpToons) purchased from CILM and used with a license.
Font of your choice.
Lets start
Open a 600 x 600 white canvas
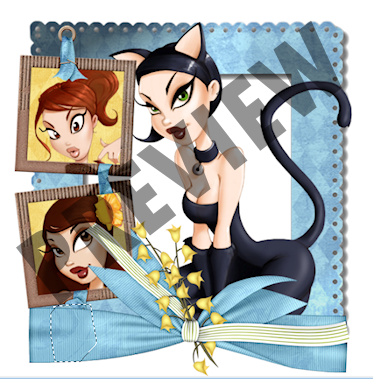
Copy/paste the LH_Breezy_Frame6 to your blank white canvas. Resize to what you're comfortable with.
Copy/paste the LH_Breezy_DoubleFrame1 and place it on the left side of your white canvas on top of the other fame. You can place it where it looks best depending on the tubes you have selected to use. Resize to your liking.
Using your magic wand select the inside of the top square of the frame you just put on
Selections - Modify - Expand by 3.
Copy/paste a paper of your choice as new layer. Position it where you like, then go selections - invert and hit delete ones on the paper layer. DO NOT DESELECT yet. Go to Selections - Invert, and copy/paste your tube of choice, position it inside the square you're working in. Then go Selections - Invert and hit delete once on the tube layer this time. Selections - Select None.
Reselect the frame again and then do the same for the second square bit.
Now we need to move both paper and tube layers to below the frame layer so just drag them down below the frame layer.
Copy/paste your third tube onto the white canvas and position it where you like.
Open up the ribbon wrap of your choice, I used LH_Breezy_RibbonWrap2. Copy/paste it to your tag. Resize and position where you'd like it. You can also play around with it using rotation or flip it etc. I used mirror on mine so that the flowers were positioned where I wanted them.
Lets bring our ribbon bit from the frame which is hidden up above the bow. To do this select your freehand selection tool. Go around the bit you want to show above the ribbon. In your layer palette select the frame. Right click on it and go promote selection to layer. Selections - Select none. Go to the layer that says Promoted selection and drag that layer above the big ribbon.
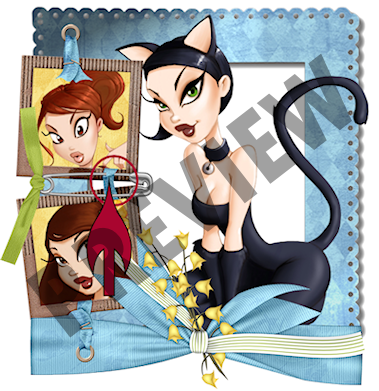
Copy/paste the LH_Breezy_SafetyPin1 onto your tag canvas. Resize and position where you like. I wanted to make it look like the pin went through one part, so take your eraser tool, and using a size 6 just erase a little bit of the top pin thats on the top part of the frame.
Now we can add some words to our frame. Type out your words on the outside of the frame using a blocky font. Fill color doesn't matter, and stroke is null. Stretch your text out to fill the space, but make sure not to cover the holes in the frame. Convert text to Raster Layer. Move it below your tube for now and put the layer right on top of the blue frame layer. Selections - Select All - Selections - Float. Highlight the frame layer now in the layer palette and hit delete once on your keyboard. Selections - Select None. Go back to your text layer and right click and delete it. You should be able to see the text on the frame now. Do the same for the sides of the frame that are visible if you like.
Okay now lets put a background in the blue frame behind the tube. Select the blue frame layer, then using your Selection tool set to Rectangle, select the inner frame bit just going below the text in the frame so you don't cover it. See preview for what I mean.
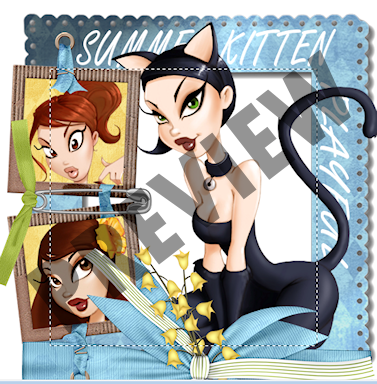
Now copy/paste a resized paper of your choice as a new layer. Selections - Invert, then hit delete on your keyboard once. Selections - select none. Drag this layer below the frame. If you picked a dark color paper you may want to drop the opacity of this layer to 50 like I did.
Copy/paste the LH_Breezy_FanFlower1 (or any flower of your choice) and resize it to fit the inside of the frame and position it just above the paper you just did. Drop the opacity of this to about 60 or 50.
All thats left is to just add your embelishments that you like. I added the Butterfly, the beads, the Easy Breezy Summer ribbon and the two flowers at the top and bottom of the cardboard frames. Rather than adding drop shadows to everything go back and only add drop shadows to the things are showing a bit off the main frame and also to you rmain tube. I ended up adding drop shadows to the carboard frames, the butterfly, the smaller tubes in the frames, the main tube and the green ribbon.
Add your copywrite. Resize if you like and then add your name or whatever you like. Delete your white layer and then merge visible. Thats it .. all done!!
Thanks for trying my tutorial and I hope you enjoyed it.
No comments:
Post a Comment